|
Summary
Moto Morini 3½ Sport of 23rd August 1975. On these pages I'll report on the restauration of this motorbike.
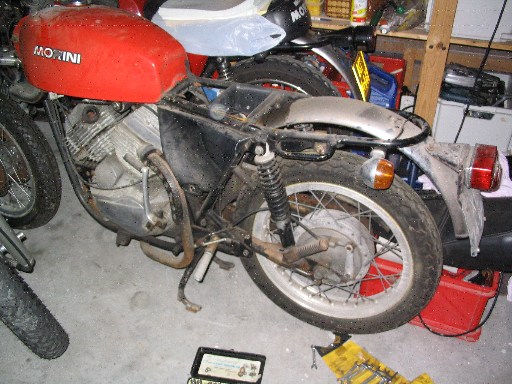
On the picture the bike the way it was offered to me in March 2010 and in that state I bought it. I did have
great hesitation to buy the bike, as I realised it would be quite a challenge to restore the bike back
to new condition. |
 |
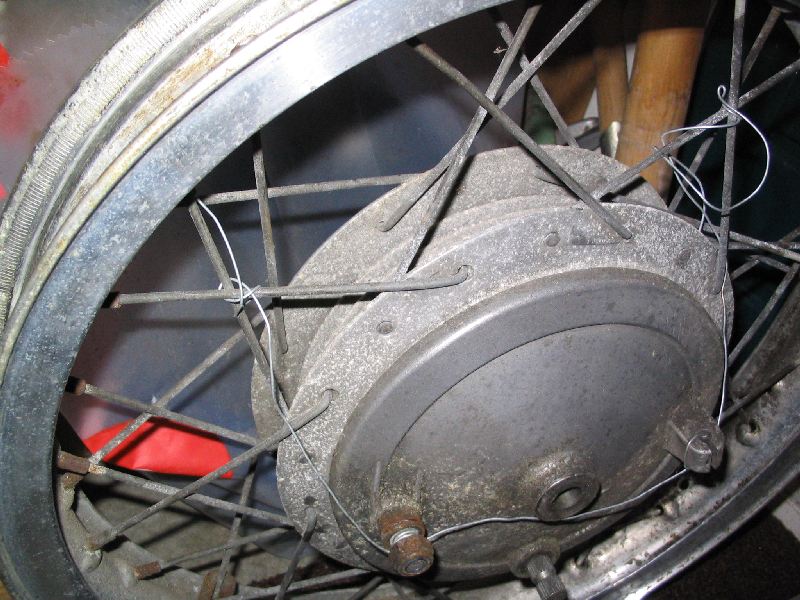
But, I realised this bike to be a rare in-between model: a Sport with Borrani (aluminium)
spoked wheels and 2 disc brakes)*.
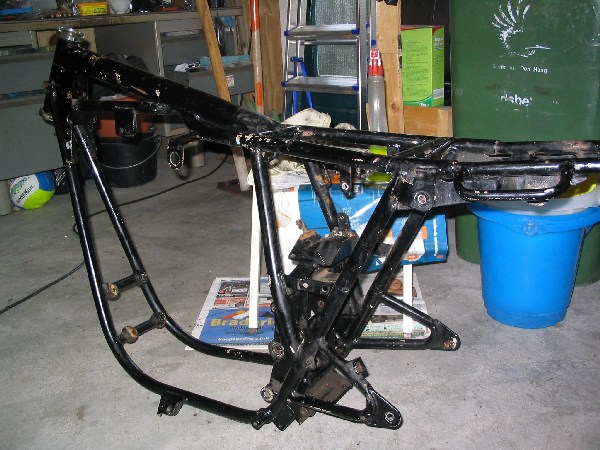
Also the frame was in good nick and the bike had an original Dutch registration from 1975. An attemt was
made to rebuild the bike as a racer and mostly when this is done, all lugs are cut off the frame. In such case,
restauration will be nearly impossible. When I bought the bike, I decided to do a serious restauration and do
it with care.
)* the 2nd disc, as seen on this Sport, was an option at the time. |
| Folling parts are missing: |
- front fender/mudguard,
- headlight and reflector,
- original Verlicchi 'lamp ears',
- original side covers,
- side stand,
- brake cilinder,
- brake switch.
|
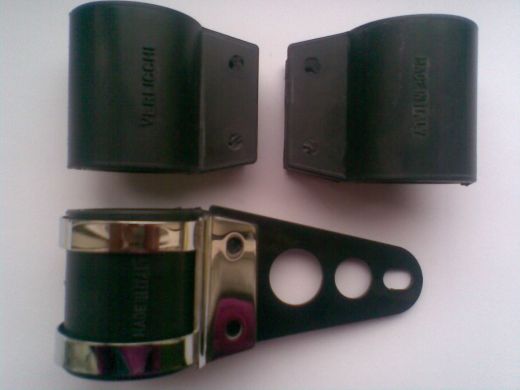 |
| | Verlicchi lamp ears. |
| Not original: |
- 2-into-1 exhaust/muffler (supposed to produce a superb sound....),
- rearset is useless/rubbish,
- a Japanese rear light on a non-original licenceplate holder of CEV.
|
| Broken, or in a very bad state: |
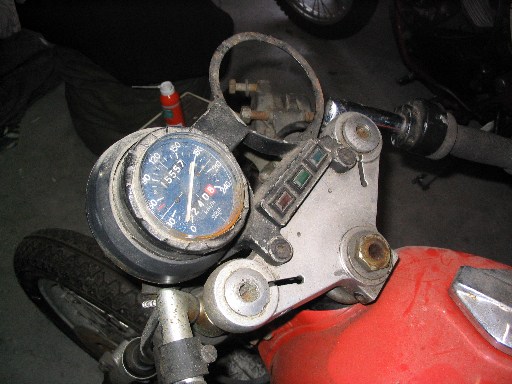
- rev. counter in bits,
- speedo is of a later type and is missing the chrome ring,
- both carbs were handed over in a box. Missing parts: slides, needles. The top-covers with the springs still attached to the throttle cables,
- electrics, the electric cables were like eaten by rats and totally useless. Nothing, absolutely nothing of the electric could be used or repaired,
- chain and sprockets,
- the 2-into-1 exhaust/muffler is in a very bad state!
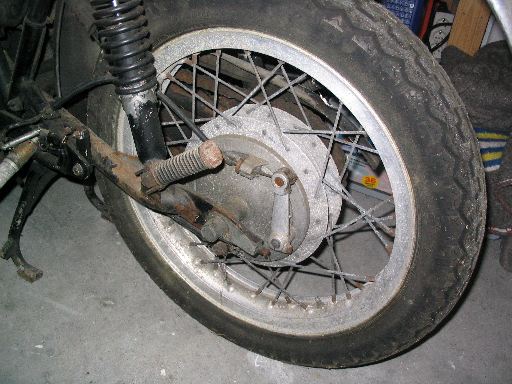
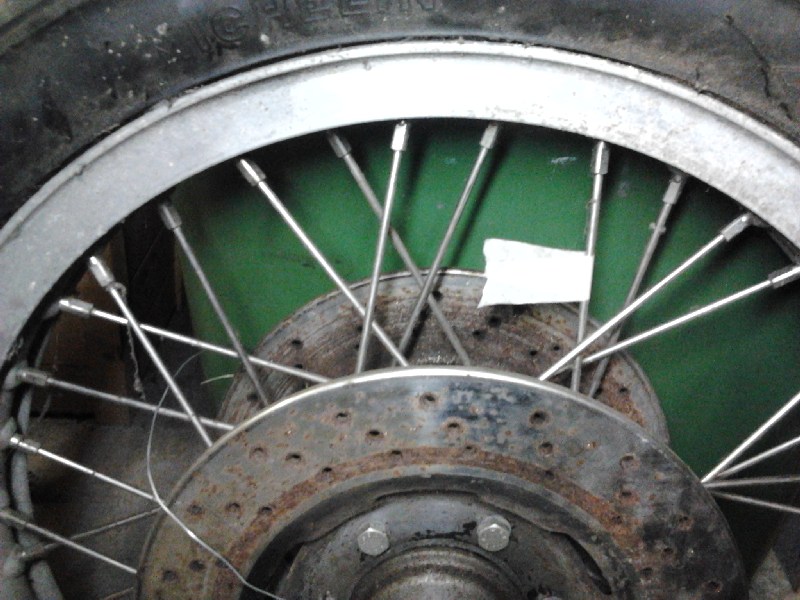
- both front brake discs are too far gone.
|
| In good shape: |
- rear stainless fender/mudguard is in a fine state,
- rear shocks are allright, real Marzocchi's. But later I found out that they were too long and came off a 500cc.
- Borrani rims with spokes, original parts on the
3½ Sport. The combination of Borrani rims with brake discs is rather special and one of the reasons for me to
restore the bike. At the time in the 70s, a 2nd brake disc was optional on the Sport.
- the 180mm rear brake is an original part of the Sport and
it is bigger than the 160mm rear drumbrake on the Touring model.
- fortunately the frame was in good shape. No cut-off brackets.
- the bike came with 2 seats: Sport and Touring. Allright shape, but to be sold.
|
|
|
|
 |
 |
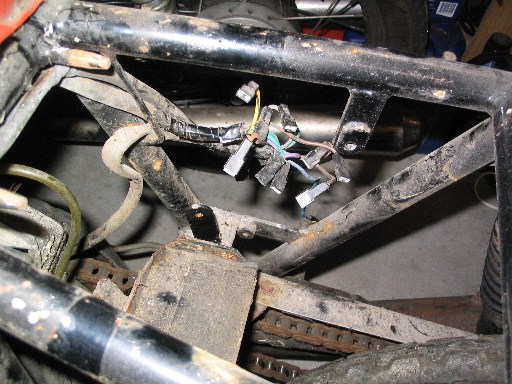
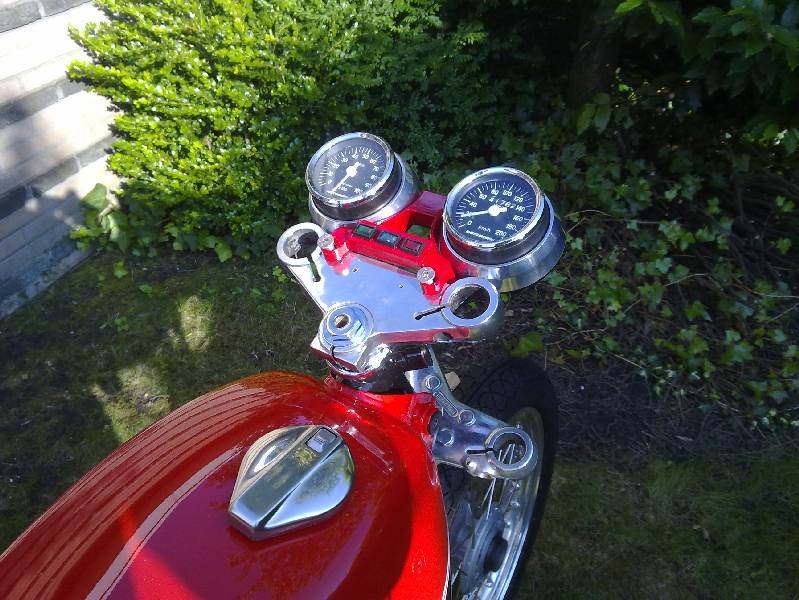
incomplete cockpit. |
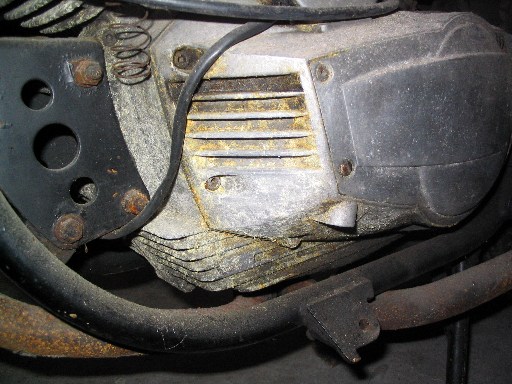
Spring dangling on the throttle cable. Dirty engine cover. Side stand is missing (but won't fit either, because of the 2-into-1 exhaust. |
 |
 |
Side covers most likely from
a Moto Morini 350 Valentini Special. |
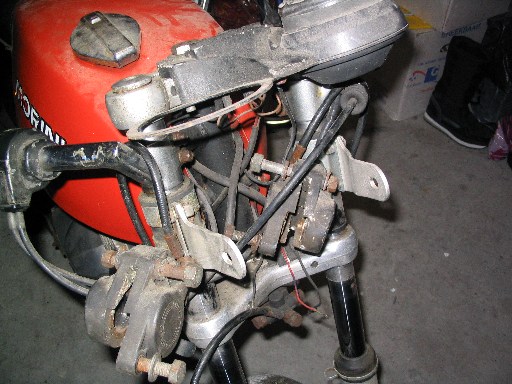
Both calipers, not complete. |
 |
 |
The Sport rear drum brake. |
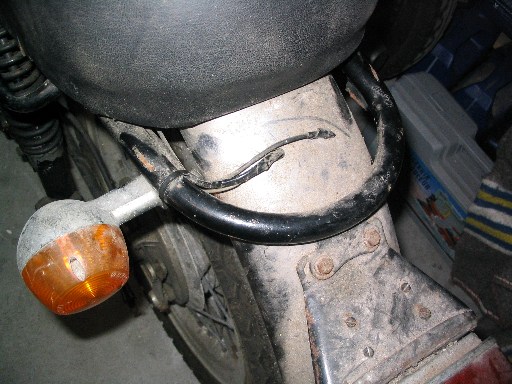
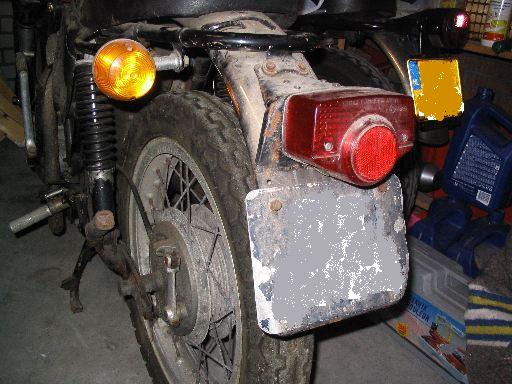
Correct rear mudguard, but wrong CEV taillight and wrong Jap. indicators. |
 |
 |
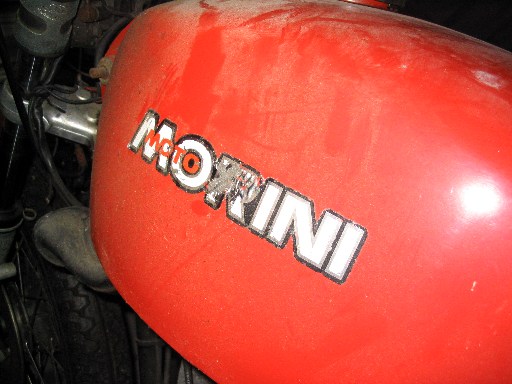
Stickers instead of badges on the fuel tank. |
Wrong taillight. |
 |
 |
Loose bits, lhs electronic rev counter, but taken apart. |
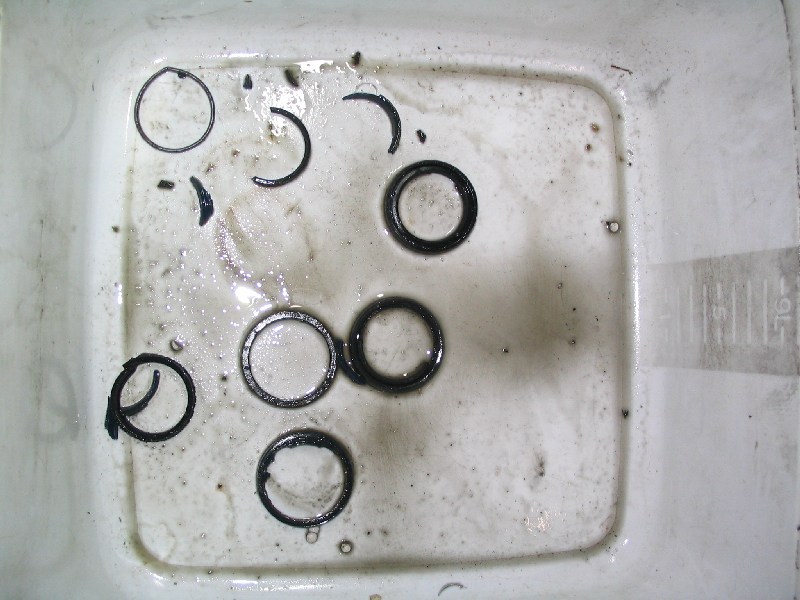
Carburettors: slides and needles are missing. Not sure yet on the jets. |
First plan to restore the bike is as follows:
- Strip the bike completely. I will make note of all missing and broken parts.
- The bare frame needs blasting by a specialist. Not sure yet about the finish: either powdercoat, or paint.
- Next, I'll make a complete new wiring harness. Not one single wire on this bike is can be used again. I have made several new wiring
sets, for this type of bike and I have already bought everything necessary :-))
- At the next autojumble 'Vehikel', I will hand in the wheels to get them re-spoked. The man has done Borrani rims for me previously
and had the drum hub 'pearl blasted'. Awsome result. At Vehikel, I will also get new tyres.
|
28 March 2010
I got a 3rd party insurance for the bike. Not that I can ride it, but if you don't have an insurance, you have to get the registration
suspended. This costs 31 Euro a year and the insurance only a little more at 36 Euro's.
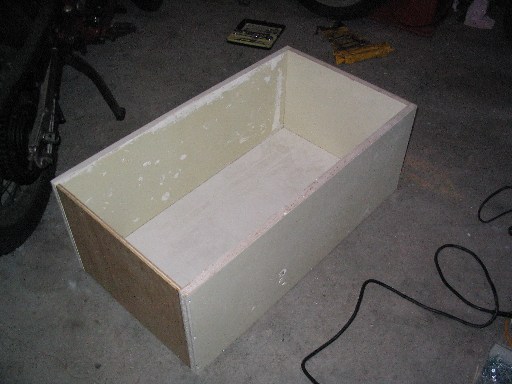
To take the bike apart is not so difficult. All you need are good/fitting tools. Keeping all the loose parts together, can be a problem. It's
easy to loose bits. That's why I first made a wooden crate of some loose planks. I will put all the parts in this crate, to prevent loosing
anything.
|
 |
After that, I started to take the bike apart. The nice bit is that the list of missing or broken parts only gets longer ;-(
- bracket for the licence plate and taillight,
- CEV taillight,
- cover fusebox,
- switch for brake light. I found something on the bike (part of the rearset, but it was broken). I will dig into this later on how to solve this,
- the black plastic knobs to keep the side panels in place,
- similar, but bigger knobs to keep the seat in position,
- rubber band and clasp to hold the battery in place,
- slides and needles of the carbs (perhaps there are jets missing, have not looked into it yet),
- airfilter elements. The airbox had these elements, but I would like to replace 'm.
Perhaps I have mentioned certain parts double, of course later, it will be one list.
Some positive news:
the engine is not stuck, but 'loose'. I had a fear, the engine was stuck after many years of just standing and collecting dust and dirt. Very
carefully, I pushed the kickstarter by hand and I could hear compression ;-) Just after that, I had a look at the oil level: still allright! |
|
|
 |
 |
First view without the seat. In the toolbox, I found a flash light relais and cables. Removed the lot. |
Taken everything off the bike, like toolbox, rectifier, fusebox. The metal plate which holds the rectifier and fusebox needs galvanising. |
 |
 |
A lot of dust and dirt, little surface rust. Some bolts simply broke off, but I could remove the lot, without using a drill. |
The crate is excellent. That way I won't loose anything (as long as I have the discipline to use it). |
 |
 |
Cut-off wiring. No problem as I will make a new wiring harness. |
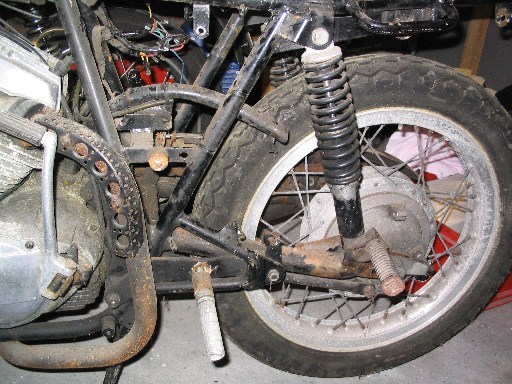
On this picture, the surface rust on the rear swingarm can be seen. |
 |
 |
Another view. |
Battery stand. |
 |
 |
The crate. |
Left-to-right: horn, transducer, airfilter with the throttle cable on it, ignition switch. |
 |
 |
|
 |
 |
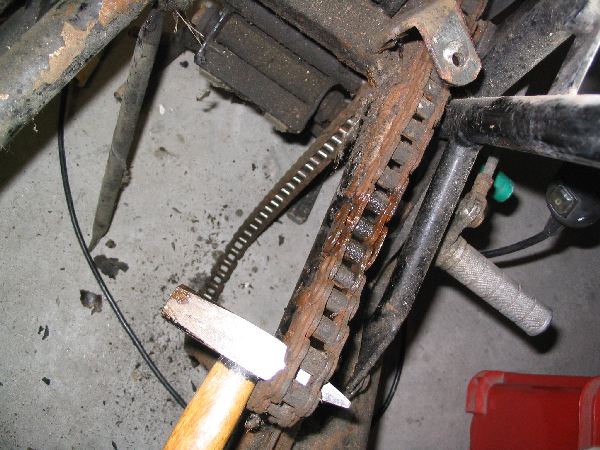
taking the bike apart is a straight forward job |
the chain gave problems, but after adding WD40, I took my hammer and the the link came out. |
the red bike in the background is my normal 350 Touring. |
I cleaned the rear mudguard with some super cleaner for a perfect result. |
 |
 |
 |
 |
took the first bolts of the flange |
on the rhs it's very thight. I could not yet get the washer out. |
I am thinking on how to get these downpipes nice and clean. |
THE WALL. |
July 2011
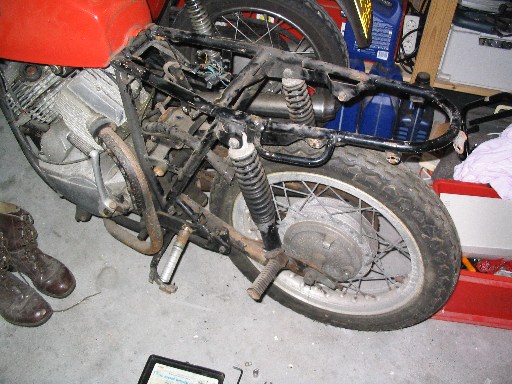
After months of doing nothing, I re-started the project! During the Winter I had taken the engine out of the frame and
also removed the rear swingarm. Next on the 'to do' list was to take off the front fork. Unfortunately, due to a missing tool, I was
unable to this job. Fortunately Ben, the father of friend Tom was able to help me out. Thanks again!
This evening I cleaned the frame of all grease and dirt. 'Dasty' a de-greaser for kitchen use did miracles! Quite a bit of dirt
and grease came off the frame. While at it, I took off the centerstand and a few other bits and pieces. I stored these bits in labled
plastic bags in order to find them back when I want to assemble the bike later. Talking of assembly: I first have to decide on paint
or powdercoat for the frame. Have not yet taken a decision. Paint is original, powdercoat possibly longer lasting. We'll see.
|
 |
 |
|
 |
 |
Above, the stripped and 'clean' frame. Fortunately, only some surface rust, nothing serious. |
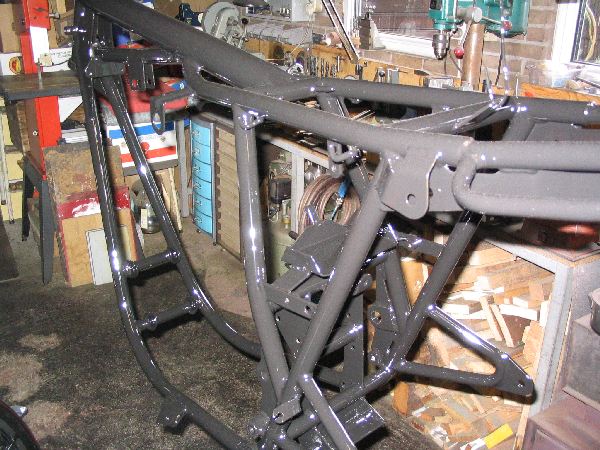
On the photo left, the frame with it's fresh paint. Yes, after some good advice, I choose for synthetic paint.
It seems grey on the photo (thanks to the flash), but it is really black and beautiful!! |
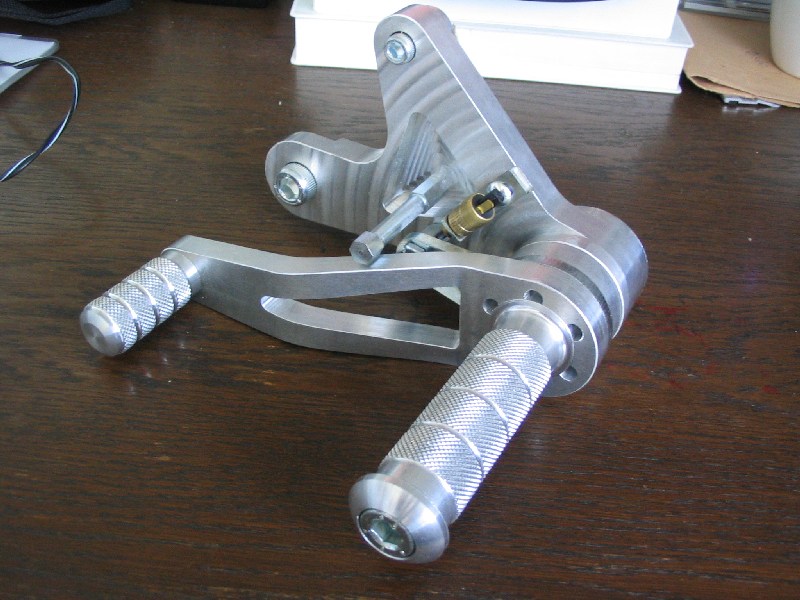
This is one part of the rearset, which I bought in Italy. The nice part is that left and right are nearly identical!
Looks like a piece of art! |
14 September 2011
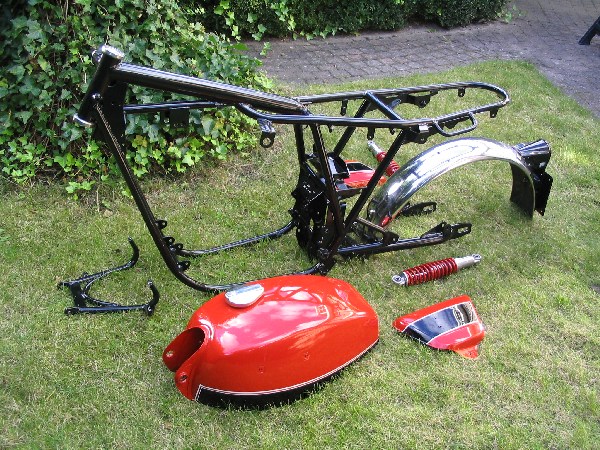
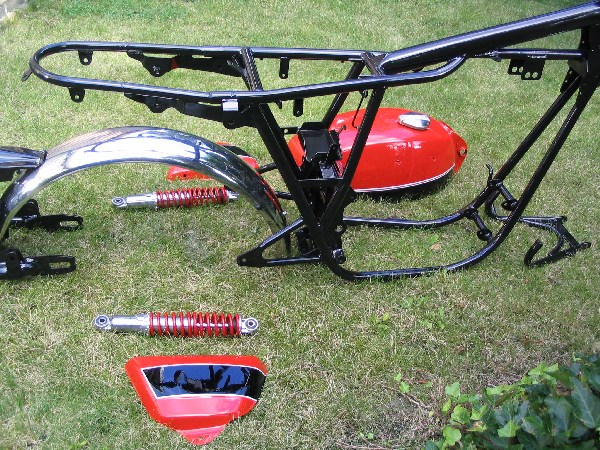
An important day! Collected the frame today, the Marzocchi shocks are fantastic, awsome!! Better than new :-))
Below a first impression of what the bike will look like. Next, I'll build a new wiring loom, as all the wires on the bikes were ready to be thrown out. |
 |
 |
|
 |
 |
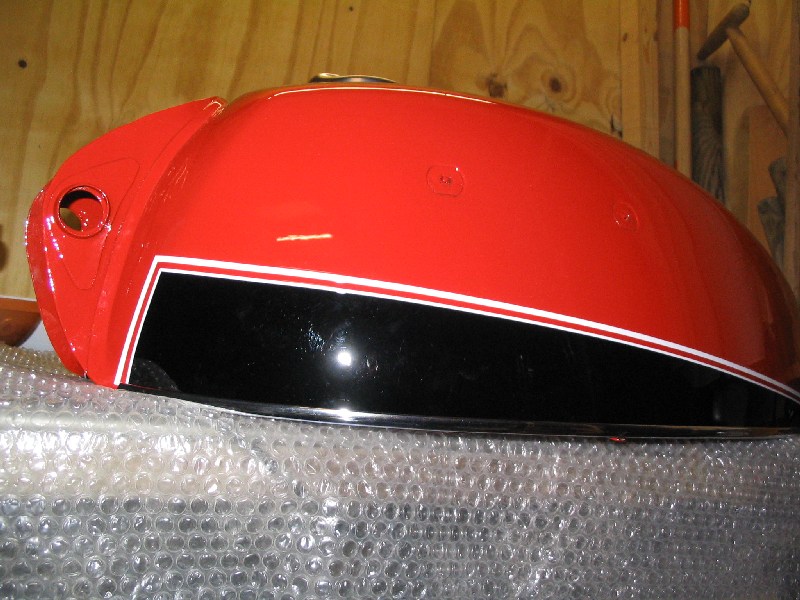
The frame should be black on the Sport models with spoked wheels. Matching fuel tank, with a
brandnew stainless cover, round sidecovers. |
|
Rearset, made in Italy.
More photo's on these rearsets, see this link |
Meanwhile, I have found parts, so the 'wanted' list has become much shorter. This is my present list of bits I still need:
- cover for the fusebox;
- airfilter elements, will soon order new ones;
- certain carburettor parts, like slides, jets and needles;
- silent blocs for the front end of the fueltank;
- brackets for the front mudguard;
- small bracket near the transducer to guide the clutch cable.
Next: I'll build a new wiring loom.
20 September 2011
Yes, the wiring was to come first. That was the original plan. Sometimes things do not go according to plan. First of all, I put the
small rubber blocks back under the frame. The center stand folds back to it. Cleaned them with some silicone spray. Used a tiny drop of
Loctite on the unsecured nuts to avoid loosing them. ;) Next, the rear swingarm went back into place. Pretty straight forward job.
The holes precisely opposite the holes in the engine mounting plates of the frame, shove the axle through and ready. |
|
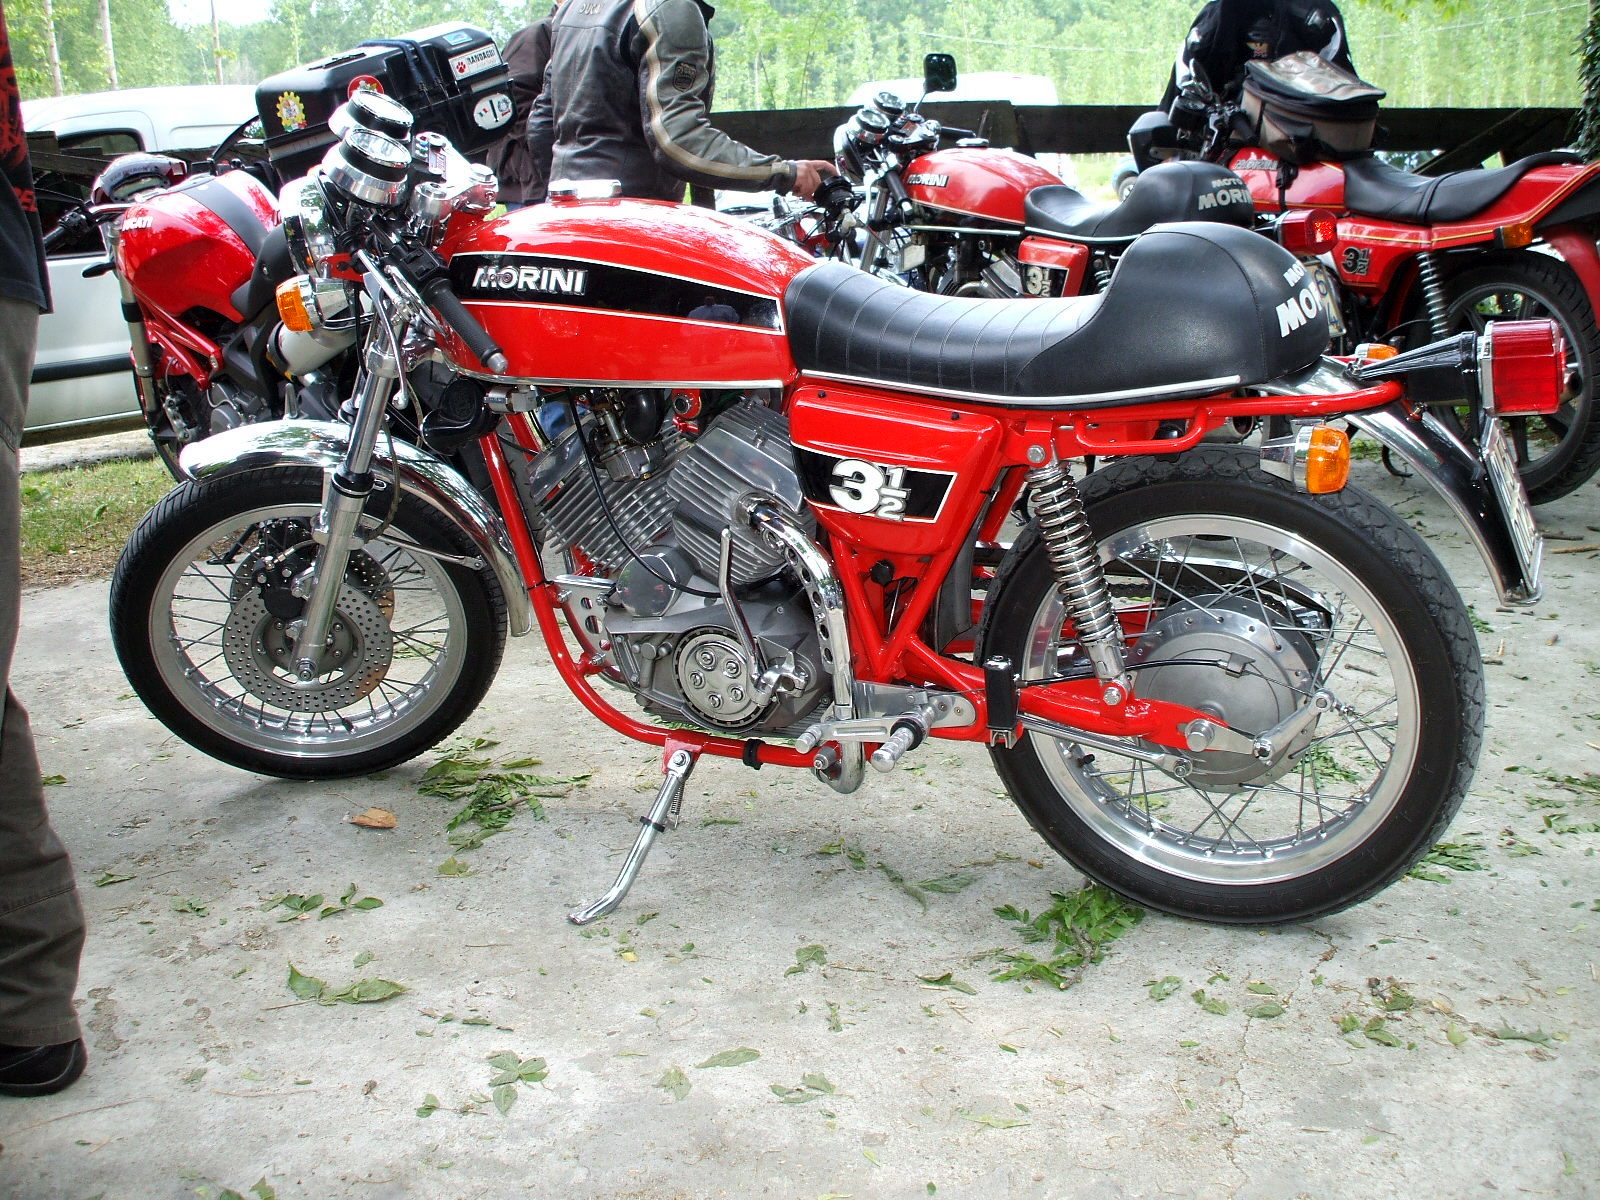
Below Gianni's beautiful 3½ Sport, a source of inspiration for me:
 |

|

|
|

|

|
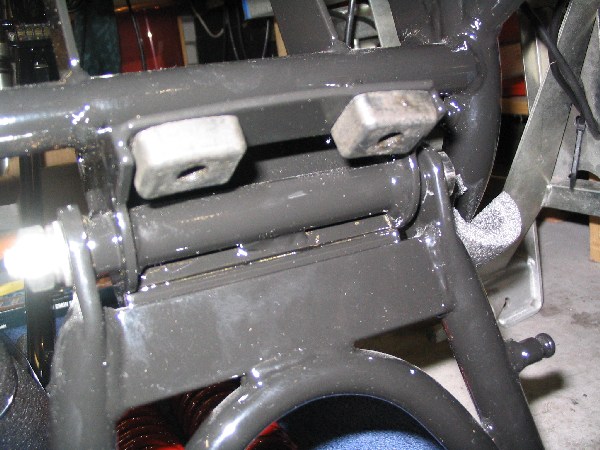
the rubber blocks under the frame. The centre stand folds back to it. |
the rear swingarm axle with the three bronze rings. |
|
set of keys for the brandnew steering lock. Lhs the previous lock which had to be drilled out,
as there were no keys with it. |
the new steering lock. |
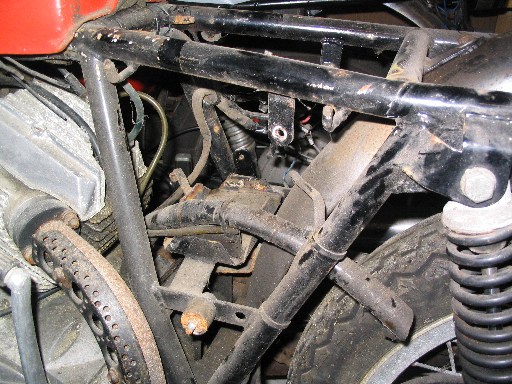
Unfortunately, it was not that simple. First of all two small plates (62) have to
be bolted loosly to the engine mounting plates. They should be loose, to be able to let the axle (53) pass. Soon as the axle is in place,
the small plates can be bolted thighly. But before you do so, three bronze rings (52), which fill small gaps between the rear swingarm and
the engine mounting plates, have to be in place. One ring fitted perfectly, but for some strange reason, the axle could not pass the two
other rings. I looked at the rings before I started and they looked identical, apart from different thickness. Just as I wanted to call
it a day (at about 23h), I took the lot apart again. Two rings would not fit around the axle. I made the holes tenths of mm's wider and
then they fitted the axle perfectly. After that I put the lot back into place. Finally, everything was done at midnight, including putting
my tools back;). I have to buy different grease nippels (50 + 74). The rear set is not original factory made and one of the two bolts is
fixed into the swingarm axle. Normally there is a mini grease nippel on that spot. Later with the rear set fixed on the bike, both sides
have to come off during maitenance. Then with the new nippel the axle can be greased. |

|
the bronze rings indicated by the red arrows. |
 |
|
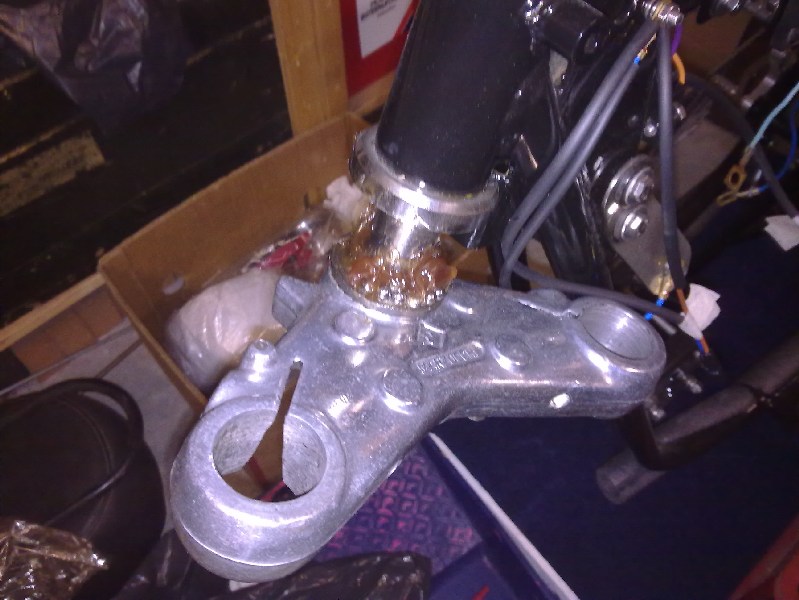
lhs a picture of the frame.
Click on picture for original size.
The parts:
- 52: one of the three bronze rings
- 53: rear swingarm axle
- 59: rubber blocs
- 62: metal plates on the rear engine mount plates
- 70: rear swingarm
- 74: 50: grease nippels
|
| |
 |
1 October 2011
The first re-chromed parts are back!! Awsome!! Also made the first new wires for a
complete new wiring harness. A nice detail: apart from the brandnew steering lock (see above), I also found a n.o.s. ignition switch!!
The correct one for this bike: 5-pole, complete with 2 brandnew keys!! |
The first re-chromed parts. The stainless cockpit rings and groundplate (top) were made
by the same person as the rear set. On the picture also the heatshield and the front and rear axles. |
 |
 |
|
 |
 |
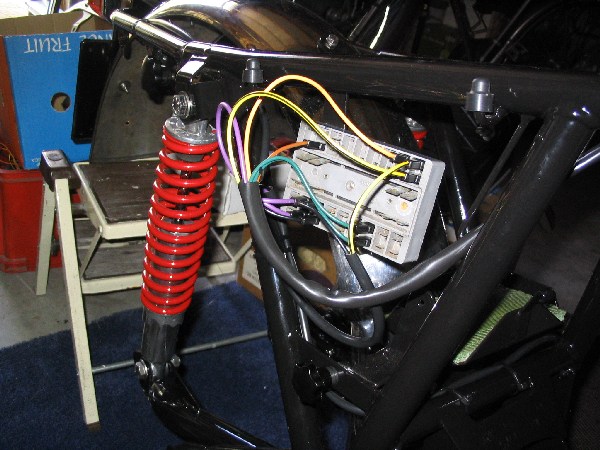
The very first wiring connected. |
Transducer and airbox back in place. |
|
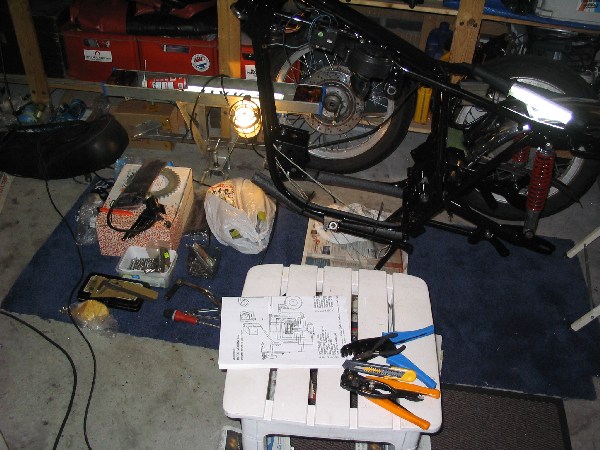
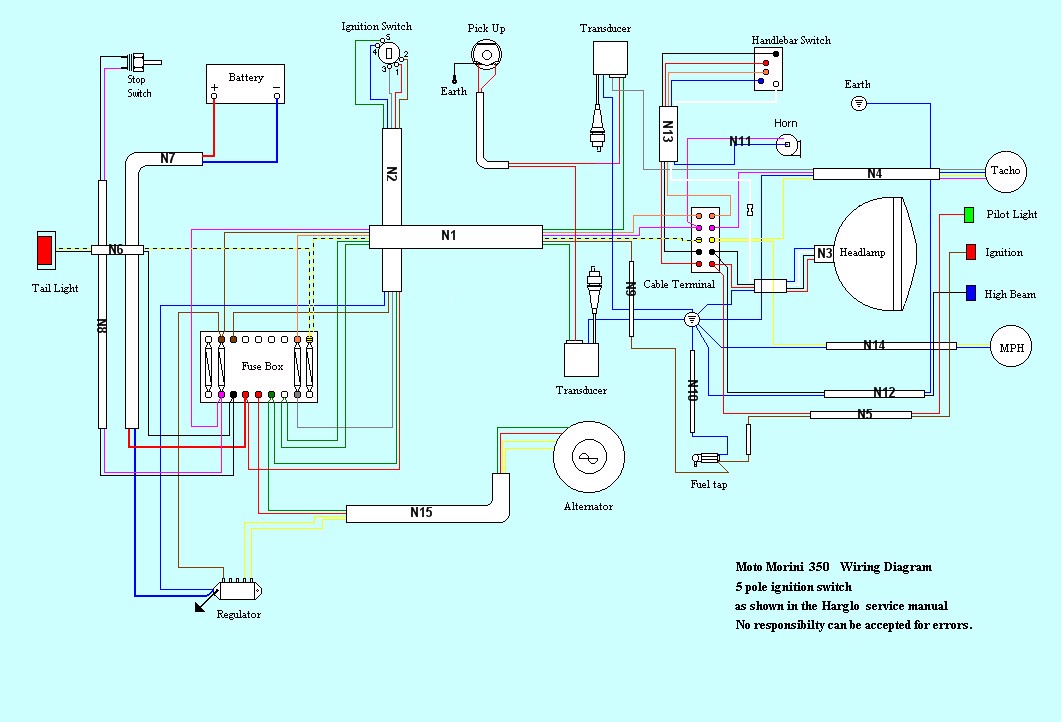
Garage, working spot. On the white seat, the electric diagram. |
The wiring harness
Making a new wiring harness for this bike is not that difficult.
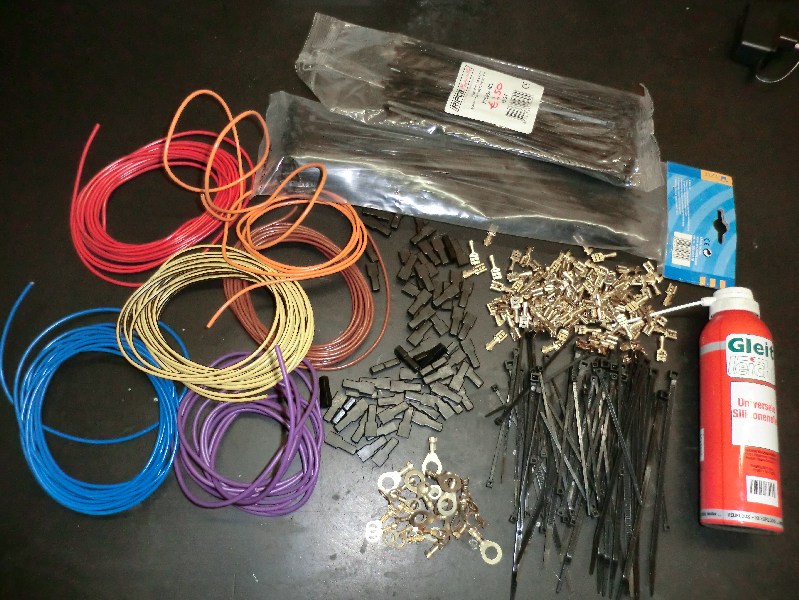
Shopping list:
- an electric diagram
- cable in the correct colours
- pvc sleeving in different widths
(for 1, 2, 3, 4, 5 and 6 cables)
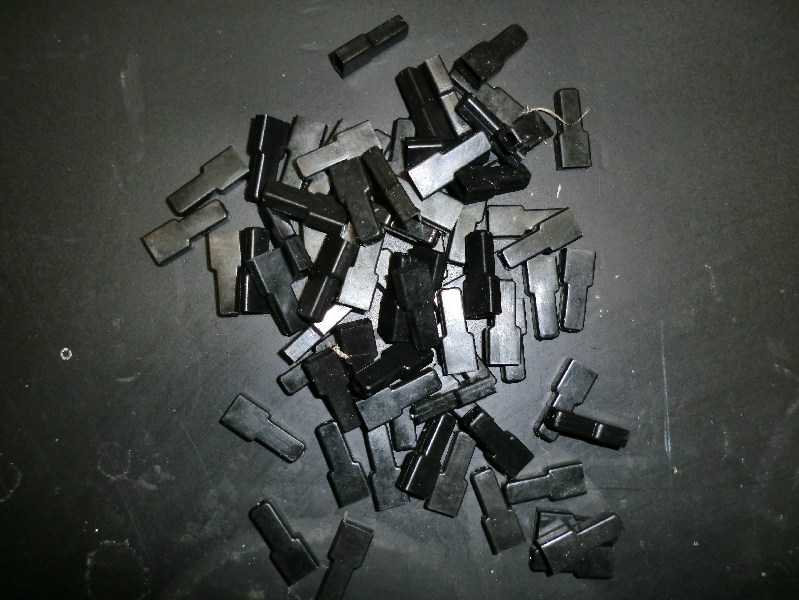
- non insulated female blades
- black, hardplastic insulating sleeves for the female blades
- cable ties, various lenghts
- cable stripper tool
- crimping tool
- silicon spray, like WD40
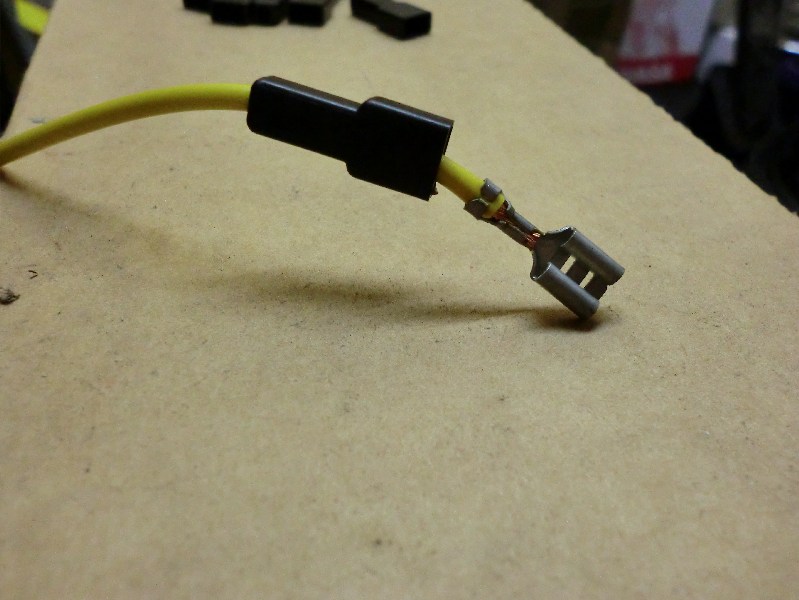
By experience, I learnt to NOT use the pre-insulated female blades with the blue or red cover! Too often, after connecting the cable,
the wire can just be pulled out! That's why they are no option for me. I do not solder the wiring. The copper gets hard by soldering.
This increases the chance that the wire breaks at the spot where the soldering tin stops. My intention is the copy the original wiring
harness on the Morini. The reason is simple. Despite some stories about 'spagetti wiring', the electrics on the bike are very reliable.
On my 3½ from 1973 nearly all the wiring is still original. Another plus of the wiring is that it consists of about 15 different cable
sets, which can be made one-by-one. Or, each set can be replaced individually in the existing wiring harness.
The method is simple:
look into the electric diagram, the thick cableset N1. It consists of 6 cables in 5 colours: 2x green, 1x purple, 1x orange, 1x brown,
1x yellow/black. N1 connects the fusebox and terminal just above the bottom yoke. Both green wires are connected to the transducers. Take
a piece of thin rope to determine the lenght of the cableset. Avoid tight bends and - if necessary - take into account that the handlebars
should move freely from left to right. Also take into account the width of the fusebox, about 12cm/5 inches. A cable connected to the lhs
bottom of the fusebox should have a slightly different length than a wire connected to the rhs top. After the lenghts of cables are
determined, cut them and push them through the pvc sleeving. When you use longer lenghts of sleeving, it sometimes is very difficult to push
the wiring through. In that case, some WD40 into the sleeving does help! Next, strip-off the cable ends, don't forget to put the black cover
in place first and before shrinking the blade terminal on the cable. Finally put the cableset on the bike using the cable ties. On the early
350s, there are three spots on the frame for earth connections. The earth wires should be blue, see the electric diagram. Use round terminals
on the cables for these earth connections.
Some tips:
- use some extra pvc sleeving on necessary spots.
- after the frame has had a re-spray or has been powdercoated, make sure the spots on the frame for the earth connections are blanc metal!
If they are not blanc, it is very well possible that the electrics don't work, or worse, the engine will not start. On the early 350s, the
earth connections on the frame can be found below the fueltank, left and right near the steering stock. Also below the rectifier. Use an Ohm
meter to check the earth connections. They are very important!!
14 October, taking it easy, half the electrics are done.
|
|
 |
 |
electric diagram (click on
picture for larger size). |
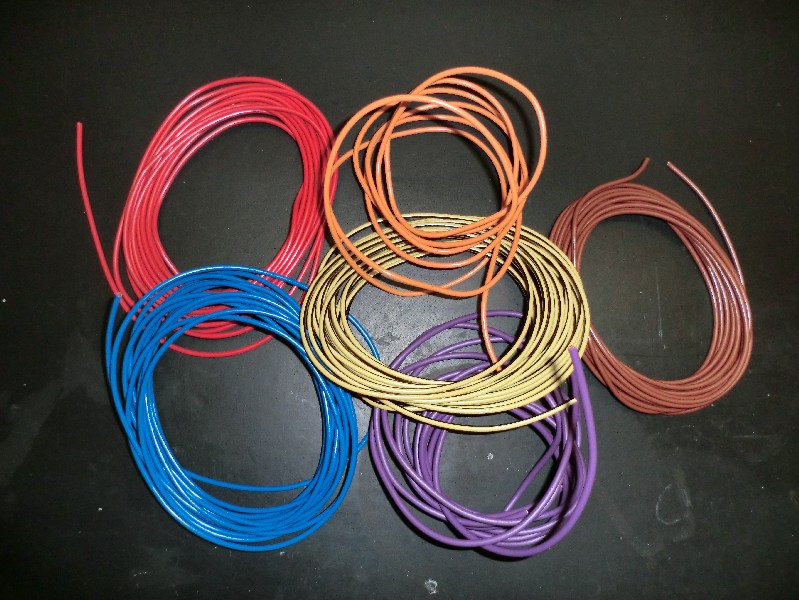
electric cable in 6 of the 11 used colours. On later models you will find more colours. |
 |
 |
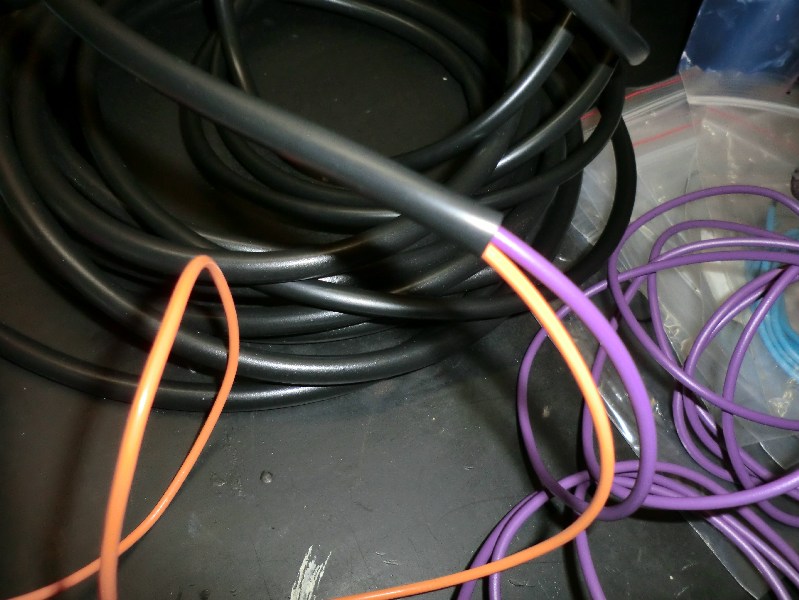
pvc sleeving. |
non insulated female blades.
|
 |
|
hardplastic insulations sleeves for the female blades. |
shrink tool: not cheap, just excellent and worth every penny. |
 |
 |
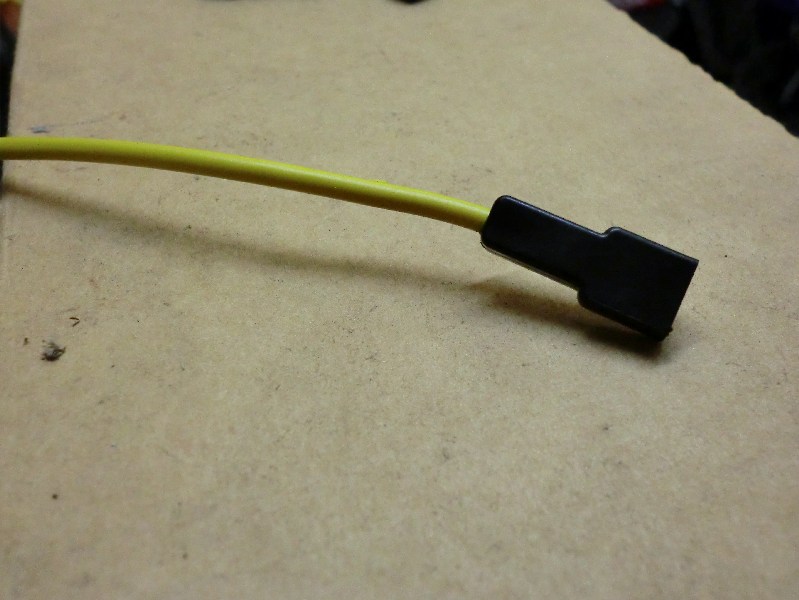
shrunck. |
result. |
 |
Photo to follow |
 |
|
Necessary... |
... and don't forget the different sizes pvc sleeving.
|
it should look something like this, the cableset in the PVC sleeving. |
|
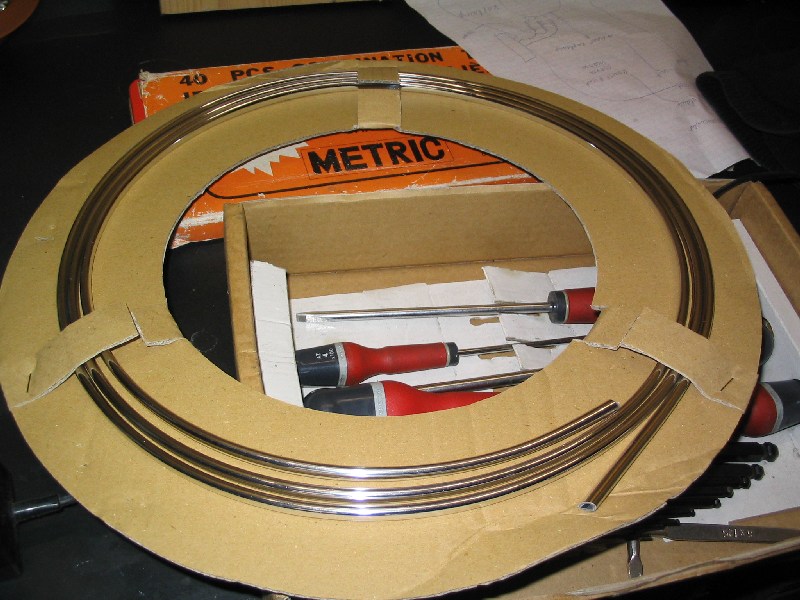
Chrome strip
Years ago I wrote down a tip on a supplier for the chrome strip which goes under (the side of) the fueltank. Fortunately, I made a
note. Of course, I needed this chrome strip for the project. It arrived today and I could not wait to put it in place. You need
2 pieces of app. 60cm's/24 inches each. Piece of cake, ... or rather strip :-))
(The remaining strip I sold on). |
|
 |
 |
| |
|
chrome strip in 3m lenght. |
difficult to see, because of the flash, but just perfect! You need app.
60cm/24 inches on each side. |
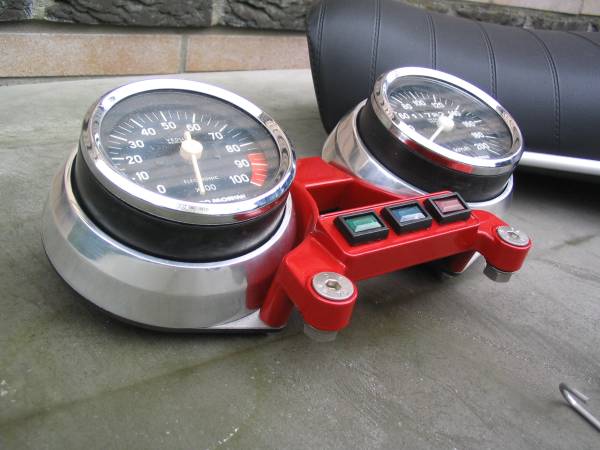
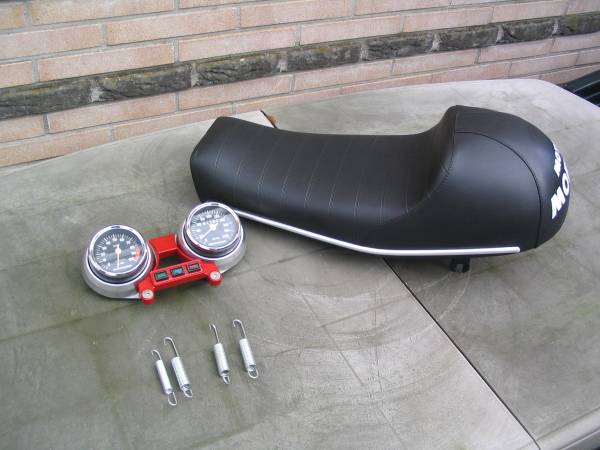
Cockpit and seat
When you do a restoration you definitely need the help of your friends! Fortunately 2 friends helped me out:
- Fer had a go with the cockpit and made it red! Awesome!! He also overhauld the original Marzocchi shocks. Superb job!
- Anton brought me a brandnew Sport seat from Italy (also many thanks to Fabio!!).
The stainless rings I brought from Italy myself, specially made by Gini Mauro, (magician with the lathe) who also made the rear set (footrests).
Many thanks guys!!! |
|
 |
 |
| |
cockpit. |
seat and centre stand springs for this and another bike. |
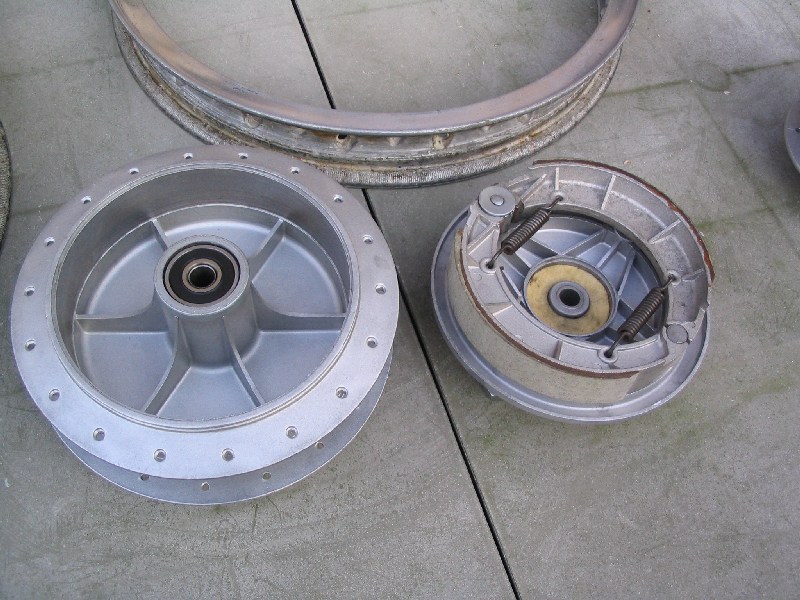
The wheels
Next step is the restoration of the wheels. Nice aluminium
18 inch Borrani rims. The Germans call these 'Hochschulter Felgen',
(high shoulder rims), because of the high sides. You find them on Italian classic sportbikes.
The following needs doing on the wheels:
- New tyres;
- The rear drum and front hub need professional cleaning;
- New bearings in both hubs;
- New brakeshoes;
- Stainless spokes and re-spoking both wheels;
- Polishing the rims;
- Get rid of rust on both brake discs.
1. On a jumble I found a set of new rubber, Metzeler ME77 in the original sizes 3.50x18 en 3.25x18. Complete with new tubes.
2. - 4. The rear drum and front hub were done on no-time. I gave them in on Wednesday. On Friday I received a call that they were done.
Perfect job, see photo's.
5. I will have to order the spokes. They are 3,6mm thick. Or in imperial sizes: 9 gauge. Aparantly there are inside and outside spokes.
From the 'inside' of the hub through the spoke hole and from the 'outside' of the hub through the spoke hole. The outside spokes have an
angle of 85 degrees, the inside spokes have an angle of 90 degrees.
6. I have already polished the worst part of the rims, but that was only the start. I need Belgom for the finishing touch.
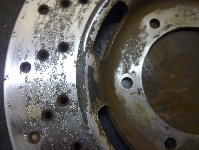
7. The discbrakes are of forged iron. But @#&%$#@! rusted. Specially
as the bike must have been standing for at least 10 years. I took off the worst rust with some very fine wet/dry sandpaper. It seems they
are too far gone and I'll have to find replacements.
8. Polishing with Belgom and very fine steelwool gave shine to the aluminium of the Borrani rims. Unfortunately, it was impossible to get
rid of some darkgrey stains.
On the 21st of March 2012, I went to a specialist and gave in both rims, rear drum and front hub. The Borrani rims will be polished
and new stainless steel spokes (9 gauge/3.6mm) will be used on both wheels. I can't wait to see the result!!
|
|
 |
 |
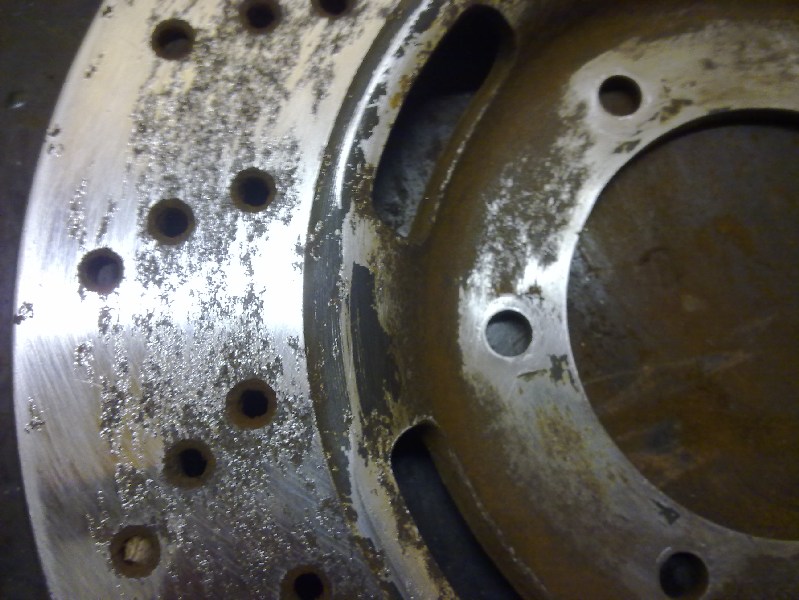
Corroded parts of rear-wheel. Look at the white 'cauliflower' on
the rear drum. That needs a professional clean-up! |
 |
|
The spoke pattern of the front wheel is different to the pattern of
the rear wheel. Aparantly this is comopletely normal. |
 |
 |
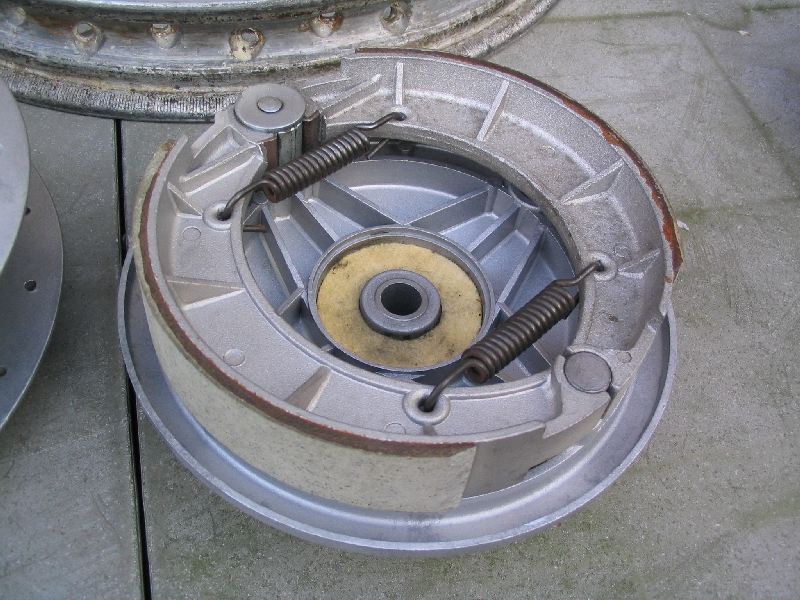
Like new: the rear drum (lhs). The new brake shoes can be seen on the rhs.
Of course all new bearings!
|
Close-up of the brake shoes. |
 |
 |
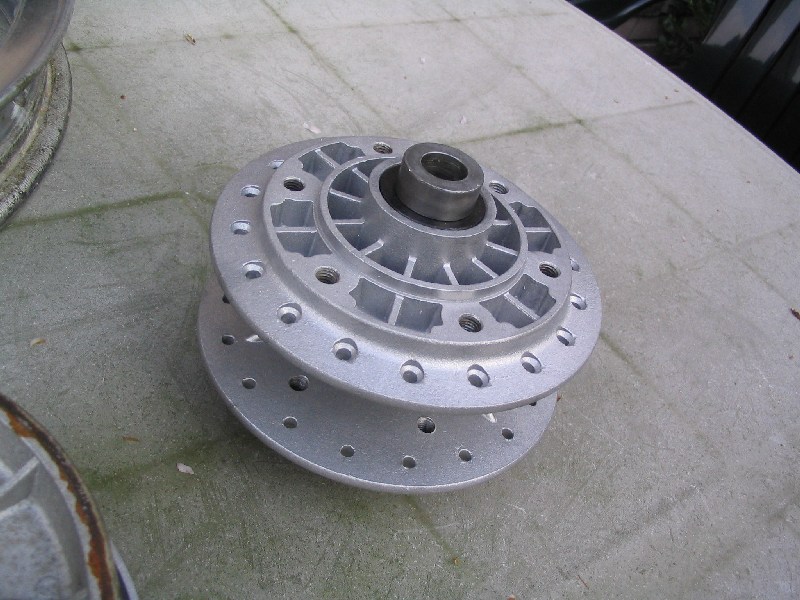
Clean front hub with new bearings.
Ready for the new spokes. |
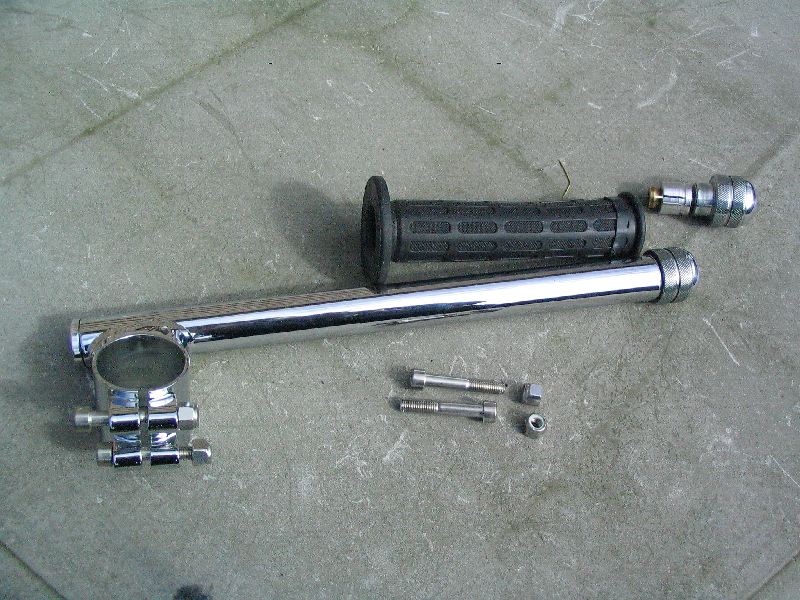
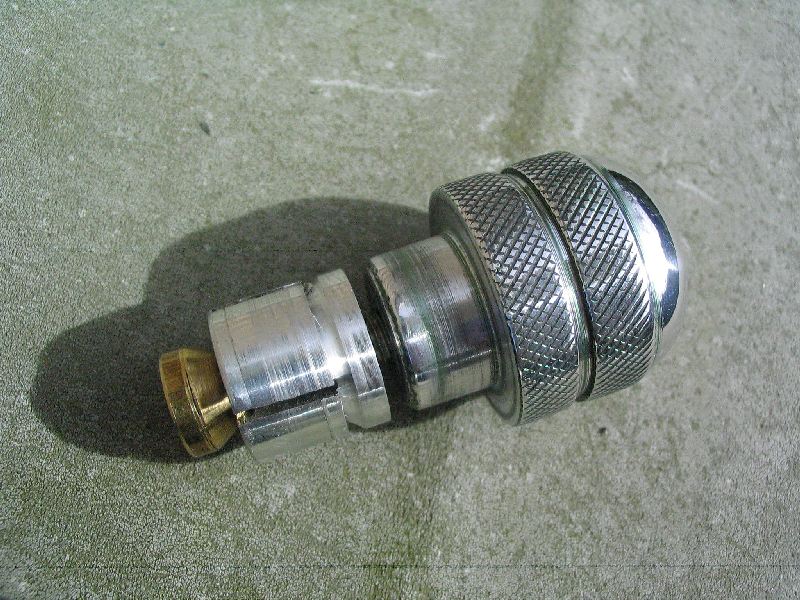
The loose parts of the clip-ons. |
At an oldtimer market, I found a set of aluminium stubs
(5 Euro) for the ends of the clip-ons. Next, I bought a set of stainless allen bolts to fix this set. The seller adviced me to
stuff a piece of rubber into the metal pipe of the clip-on. Then use that to screw-in the allen bolt. Fortunately, my friend Fer
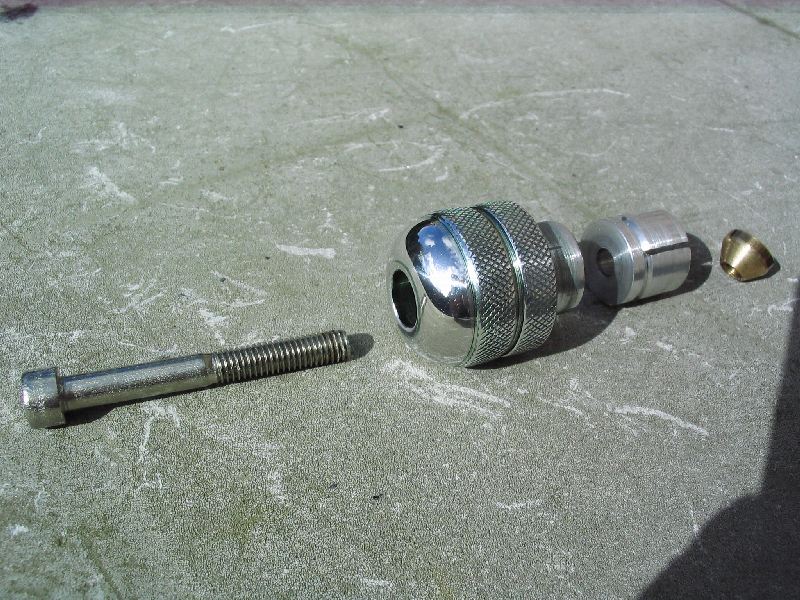
had a better solution! Have a look at the fantastic result!!!
He made aluminium plugs on his lathe. Also made a conical bronze nut. If you thighten the allen bolt, the aluminium plug expands
by the pressure of the conical nut. Similar to a steering column of a bicycle. Brilliant and solid solution!!
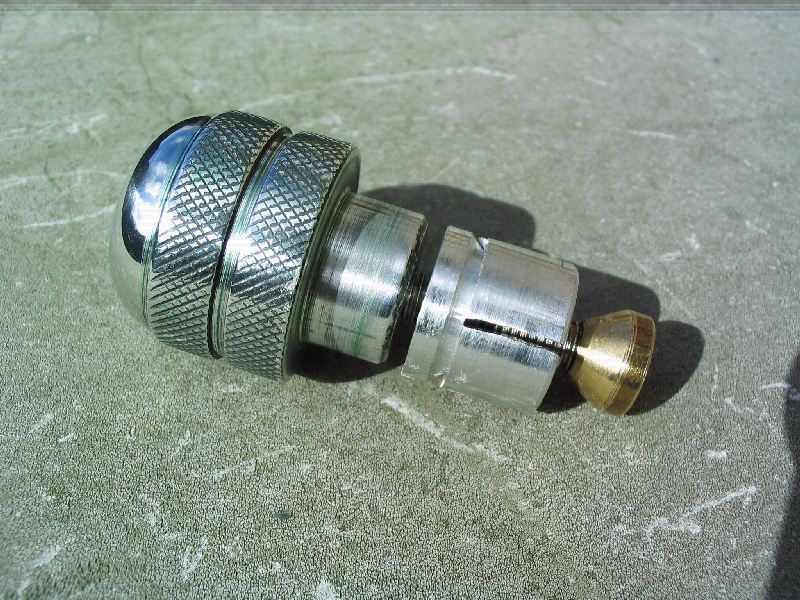
When busy on his lathe, he made aluminium caps for the top-ends of the clip-ons. After a quick polish, they look stunning.
Much, much nicer than the originally poor looking plastic :-))
|
 |
 |
|
 |
 |
No need to comment! |
|
|
Lhs the aluminium cap at the top of the clip-on. |
|
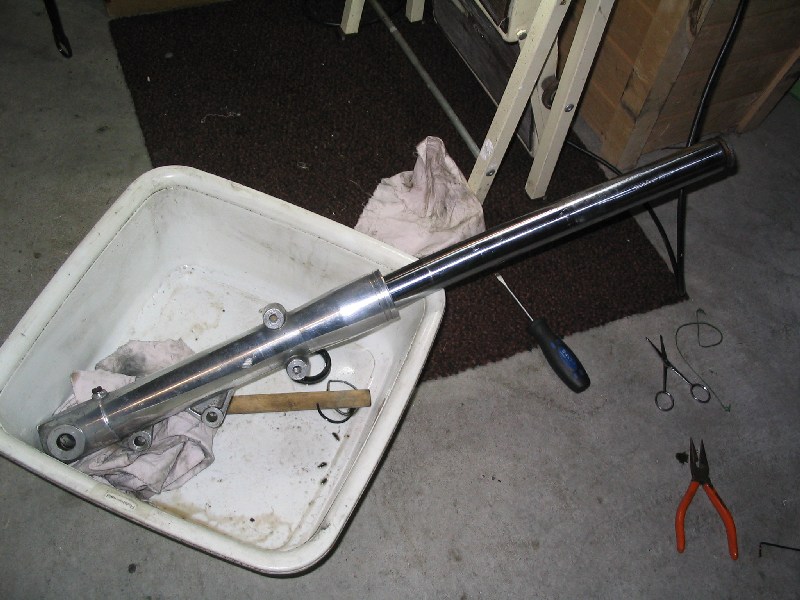
The front fork, April 2012
Meanwhile, I have started on the Marzocchi front fork. New ball-bearings for the headstock were bought some time ago.
This week I took both fork legs out of the top and bottom yoke. All these parts were very greasy/dirty. Brake cleaner gets the
parts clean :)
After that I used the Belgom aluminium polish for the top yoke: it will even get better, as my friend Fer will polish it. When I
brought the wheels to the shop for the new spokes, I stopped at Fabory to get new allen bolts for the yokes. The frame will get
stainless bolts and nuts all around. But where I have to fix them into aluminium, I use galvanised 8.8 bolts. After the cleaning
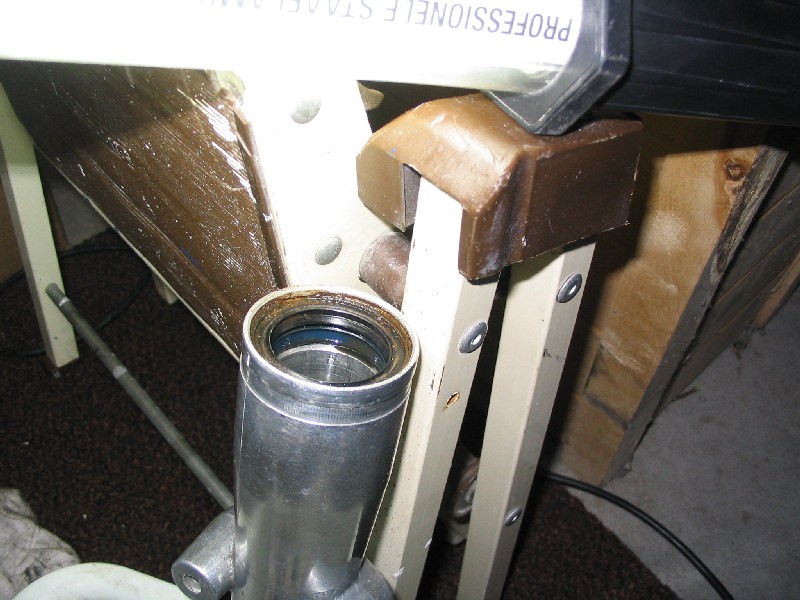
job of the inside and outside of the fork legs, I removed the oil seals. I then noticed one of the inner forklegs is bent as
anything. That stops me to finish the job ..... first I need a straight inner forkleg. |
 |
Removing the oil seals. |
 |
 |
|
 |
 |
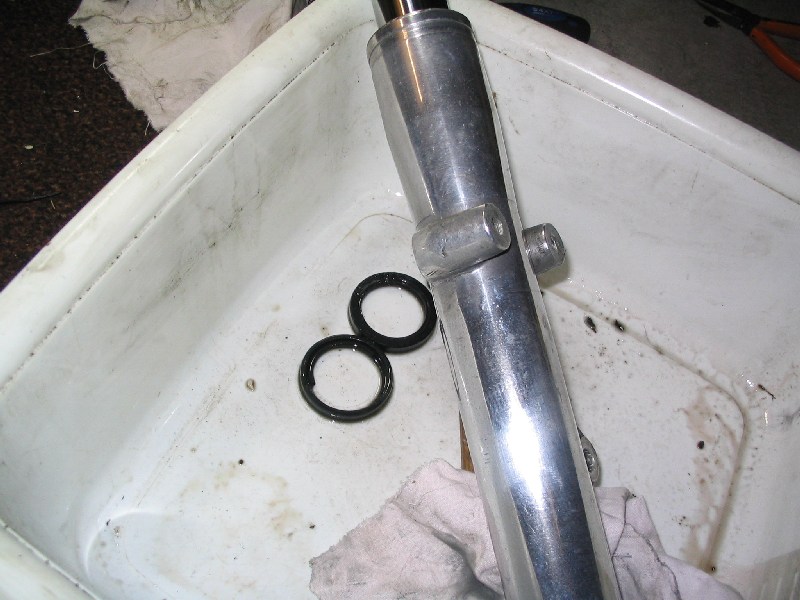
Here you can see both oilseals on top of eachother in the outer forkleg.
|
Both oilseals of the first leg taken out. |
|
The four oilseals, or what there is left of it ;) |
The bent inner leg on a flat surface. It's difficult to see on a picture.
But take it from me, it's much out of shape! |
|
Back to the wheels
On the 21st of March 2012, I brought the wheels to a company specialised in re-building wheels. After my
instructions "stainless spokes and please polish the rims", I left them in their trusted hands after I was told "they would
be ready after Easter". So on the 11th of April I phoned the shop to find out if they were ready. The answer was a simple "yes".
In the afternoon I drove up there to collect them. The result is beyond my expectations:
fantastic!!
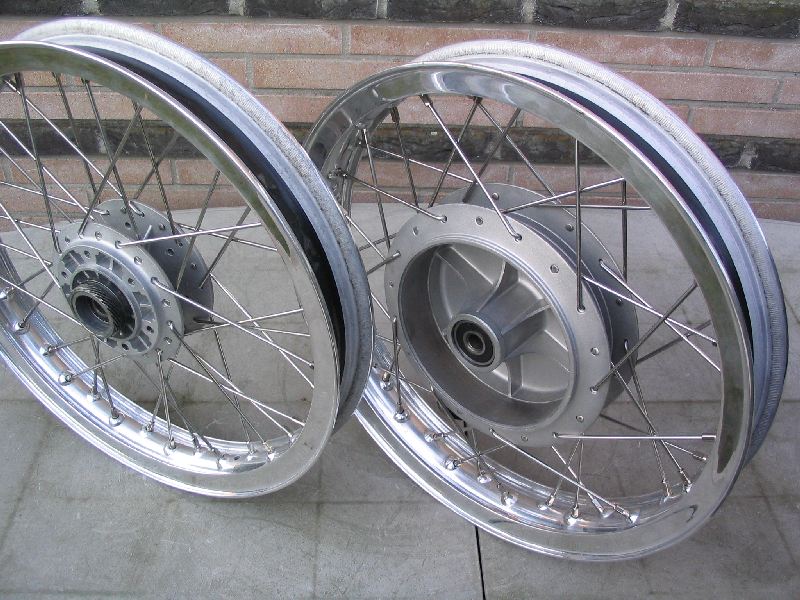
Next step will be of course to get the new Metzeler ME77 tyres around these rims. I have chosen for the original sizes:
rear 3.50x18 and front 3.25x18.
BTW: the wheels were done at Haan wheels in Schijndel/the Netherlands. |
|
 |
 |
| |
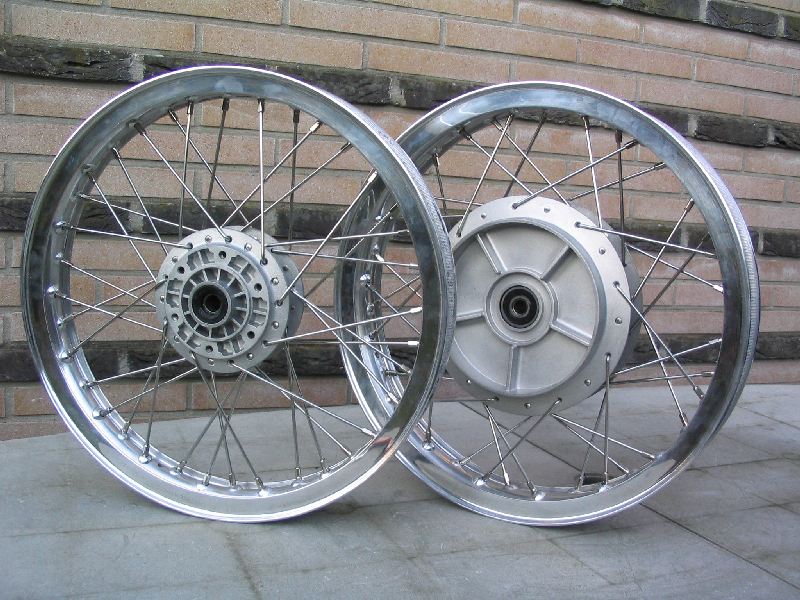
The re-spoked rims. The stainless spokes are 9 gauge,
or 3.6mm). Also new bearings for both wheels. The rear drum got brandnew brake shoes. |
|
Present state
After the Summer holidays, I went to a local garage to get the tyres put on the rims.
My 'to do' list is getting shorter. Main things to do:
- finishing the the wiring, specially at the front end of the bike;
- getting the forklegs hardchromed;
- assemble the front fork;
- (hard?)chroming the brake discs;
- new brake lines for the front discs;
- overhaul the engine.
|
|
 |
 |
| |
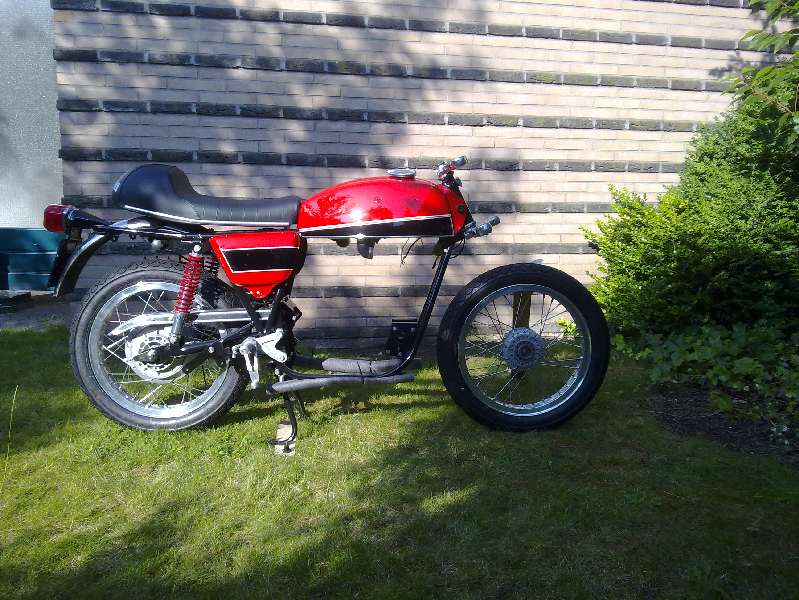
The present state (mid Augustus 2012). It is starting to look like a bike again!! |
At the end of October 2012, I had the inner
forklegs re-chromed. That was the moment to re-assemble both upper and lower steering ball-bearings with new 1/4" steel balls
and a lot of bearing grease.
The covers at the top of both forklegs needed some more 'treatment'. In these covers, at the top, there is an M6 bolt with a
small spiral spring (size ballpoint) and an even smaller bearing ball. At one of the covers these smaller parts were missing.
The M6 from the other cover was very stuck. It would not come loose, not even after heating the part with a flame. It needed to
be drilled out. Thanks Fer!
|
|
 |
 |
| |
Lower stearing ball-bearing with new 1/4" balls. |
|
At the end of November 2012, it was time to put the front fork back into place. When the front fork axle was chromed, the new
chrome was 5cm's 'too wide'. On these 5cm's, the axle was 0.5mm too thick. That way it would not go back into place. Fortunately,
Fer solved the problem with his lathe. The first material he took off using a file. After that, the chisel of the lathe came into
action. The result was a perfect fitting axle. The piece of the axle sticking out has got nice and shining new chrome.
This week, new brake lines will be ordered. |
 |
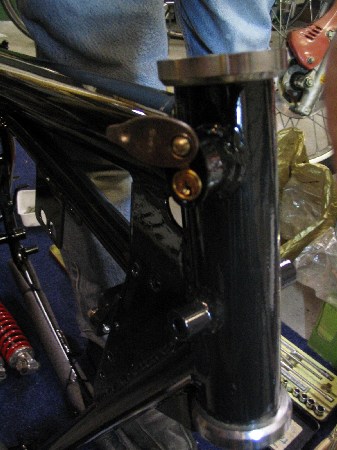
Front fork and mudguard (fender) mounted. |
Brake lines, brake discs, December 2012
I received the brakelines in December 2012, complete with the necessary smaller bits. I was thinking a lot to find a proper
solution for the rusted discs. The front is - just about - allright, the rust is mainly on the back of these parts. Cutting
off some material with a lathe is of course an option. After that, new hardchrome is another option. To do this both is costly,
as the chroming process is 'unfriendly' for the environment.
January 2013
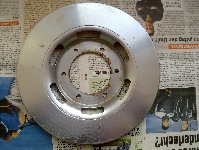
Mid-January 2013, I joined friends to visit an oldtimer market. To my surprize, I found brandnew (new old stock) Grimeca 260mm
discs. Without hesitation, I bought them, as the specifications were correct. New Grimeca discs are extremely rare. Of course, it's
possible to replace them with Brembo discs, but these are made of cast-iron, while the Grimeca's are probably made of pressed steel.
Anyway, I will sell the old discs. That way I can deduct some money from the purchase price and keep within budget :-)) |
|
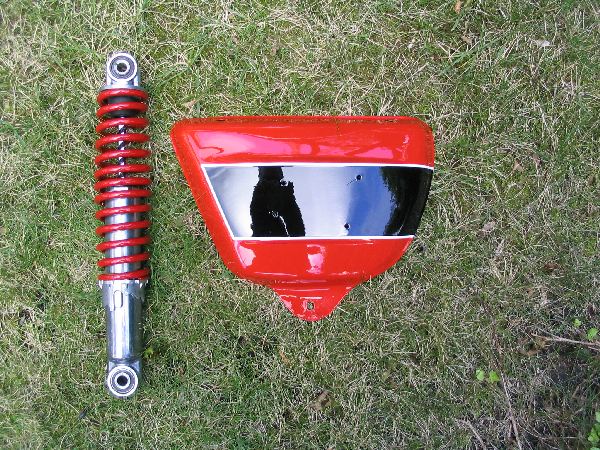
Both bad luck and luck. All about the Marzocchi shocks
First the bad luck. On the photo's above you can see the perfect restored Marzocchi shocks. Very well polished, the springs in
a nice colour, ..... BUT ..... these shocks are too long for the Moto Morini
3 1/2 :-((
It was weird to find small metal blocks welded under the central stand. When I put a normal standard under the fame, it was
clear the shocks were too long. Fortunately, it did not take long to find Marzocchis of the correct lenght. These will also be
polished as nicely and the springs will get new chrome.
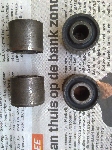
On these new shocks, the only problem were the worn silent blocks. Again, very difficult to find original replacements. I found
a German company who produces these parts. But at what price....
Then I was extremely lucky to find an "address" not too far away. They sold me the original parts at a very reasonable
price.
Lucky again!!
|
|
 |
 |
Again, an old disc, after I took off as much rust as possible. The new
ones (rhs) do not have the holes in the surface, but that is no problem. |
One of the new Grimeca discs (with some innocent surface rust). These
discs must be some 30 years old. True 'new old stock'. |
 |
|
New silent blocks for the shocks. |
Continue on
page 2
|